Ошибка 1603 при установке Java – как решить проблему?
В процессе своей работы многие созданные под Windows приложения используют библиотеки, входящие в состав встроенных или отдельно устанавливаемых фреймворков вроде NET Framework. Одним из наиболее распространенных компонентов подобного рода является Java – программная платформа, разработанная компанией Sun. В свое время Java играла значительную роль в адаптации программного обеспечения, служа своего рода прокладкой между железом, операционной системой и программной средой. Сегодня данное ПО уже не столь востребовано, тем не менее, есть еще немало приложений, которые в нем нуждаются.
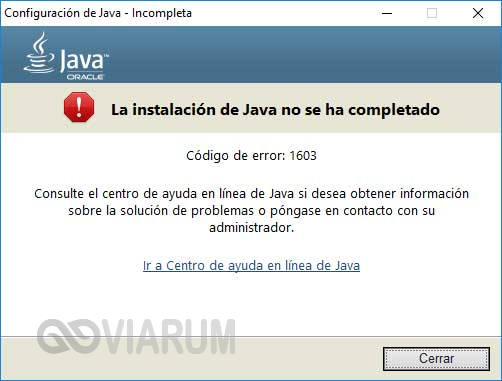
Если при установке какая-то программа потребует наличия Java, следует скачать ее последнюю версию с официального сайта и установить на ПК как обычное приложение. Обычно инсталляция пакета проходит без проблем, но в некоторых случаях на этом этапе вас может ждать неприятный сюрприз, а точнее ошибка 1603, указывающая на сбой установки.
Основные причины возникновения ошибки
Сталкиваться с этой неполадкой чаще всего приходится при повторной установке или обновлении Java. Вообще же, error code 1603 является вполне типичной ошибкой инсталляции и возникает не только при установке Java, но и при работе с другими программами. Причины сбоя чаще всего кроются в повреждении установочных файлов, прерывании процесса, некорректной перезаписи или удалении связанных ключей реестра. Кроме того, ошибка Error code 1603 Java может быть спровоцирована недоработанными накопительными обновлениями Windows.
Что предпринять при появлении ошибки установки Java
Итак, вы столкнулись с ошибкой error code 1603 Java. Что делать? Наиболее эффективным, а, значит, и правильным решением в таком случае будет полная переустановка компонента. При этом для удаления старой или поврежденной версии Java лучше использовать специальную утилиту Java Uninstall Tool, скачать которую можно с официального сайта www.java.com/ru/download/uninstalltool.jsp.
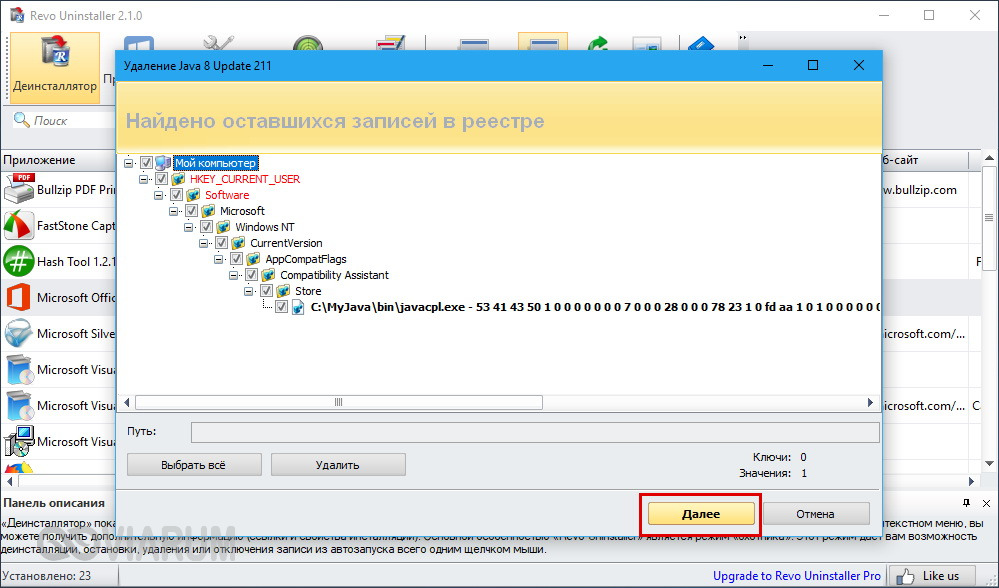
Для деинсталляции также отлично подходят сторонние приложения, такие как Wise Program Uninstaller или Total Uninstall. В отличие от стандартного средства удаления программ, эти приложения позволяют находить и удалять оставшиеся после деинсталляции «хвосты» – временные файлы, папки и ключи реестра, часто вызывающие конфликты при новой установке.

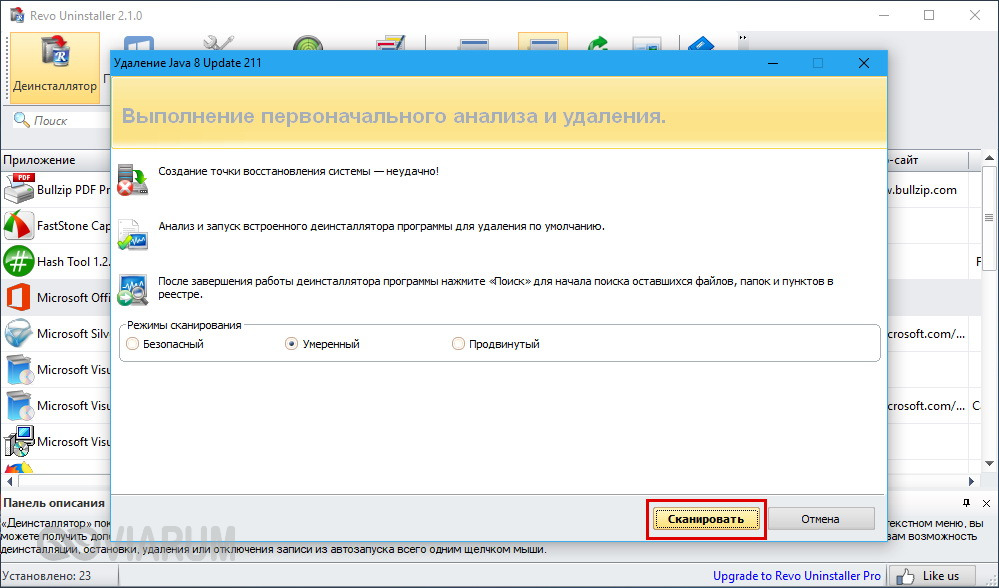
Опытные пользователи могут выполнить дополнительный поиск мусорных каталогов и ключей реестра по ключевому слову «Java», но это довольно рискованная операция, поскольку высока вероятность удалить что-то важное. После деинсталляции платформы следует перезагрузить компьютер.
Удаление потенциально конфликтных обновлений
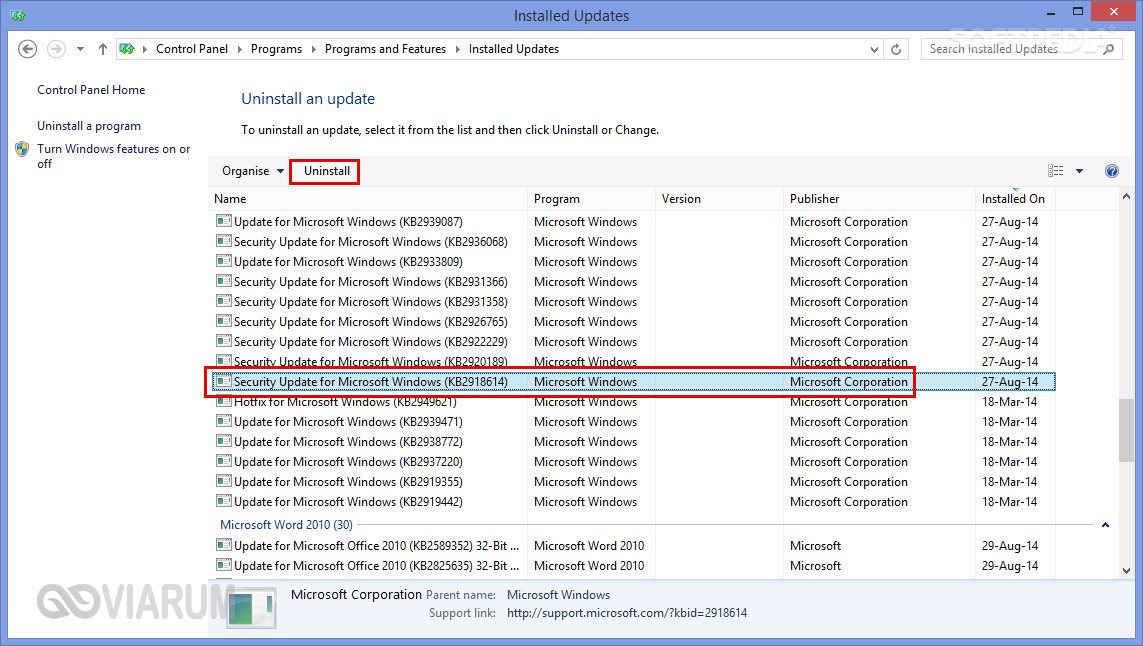
Если незадолго до появления ошибки error code 1603 при установке Java вы устанавливали накопительные обновления, попробуйте их удалить. В частности, проверьте, имеется ли на вашем компьютере пакет обновления KB2918614, если он есть, удалите его.
Изменение расположения установки и проверка прав доступа
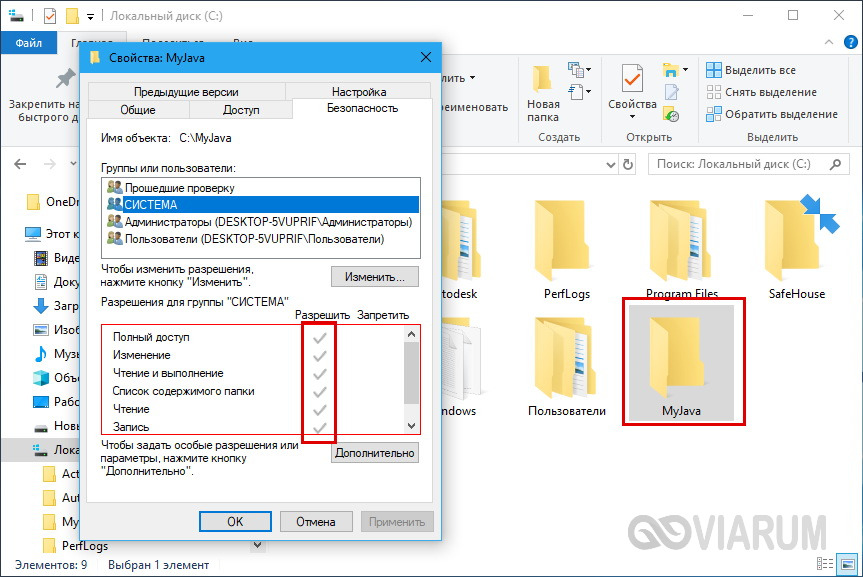
Ошибка 1603 в процессе установки Java иногда возникает по причине отсутствия прав у Системы на каталог, в который устанавливается приложение. С проблемами вам также придется столкнуться, если попытаетесь установить Java на съемный накопитель, зашифрованный диск или в защищенную подобным образом папку. Мы не рекомендуем изменять права доступа на системные каталоги, вместо этого создайте в корне диска С или D отдельную папку и убедитесь, что пользователь СИСТЕМА имеет на нее полные права.
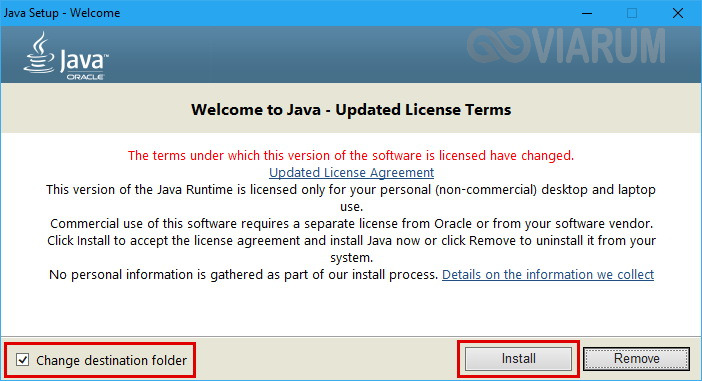
Теперь можно приступать к повторной установке. Скачайте с официального сайта автономный установщик Java, потому что это самый надежный вариант. Перед тем как запускать исполняемый файл установщика, откройте Диспетчер задач и проверьте наличие процесса MSIEXEC.EXE. Если он запущен, завершите его. Запустите установщик Java, отметьте галочкой опцию «Change destination folder» и нажмите «Install».
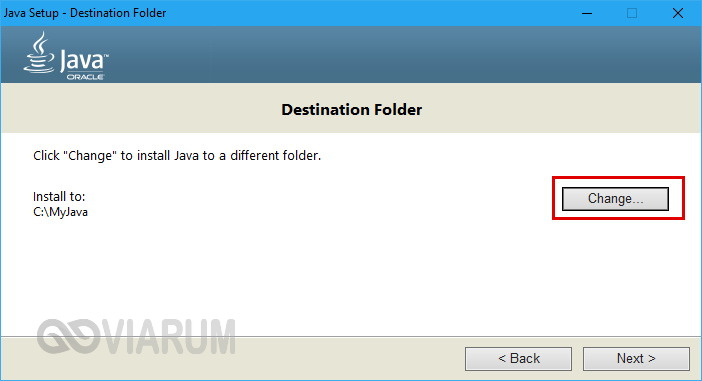
В следующем окне мастера нажмите кнопку «Change», укажите путь к альтернативному месту установки и выполните инсталляцию платформы в штатном режиме.
Отключение Java-контента в браузере
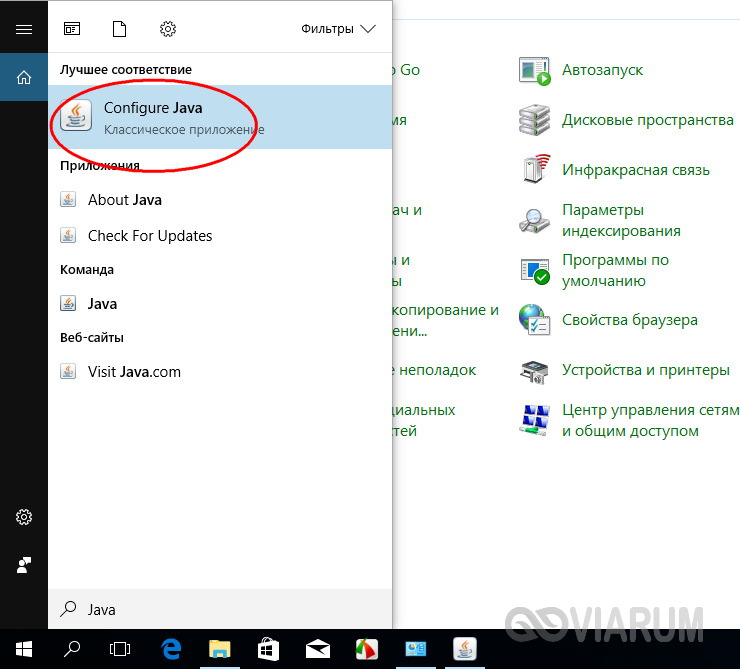
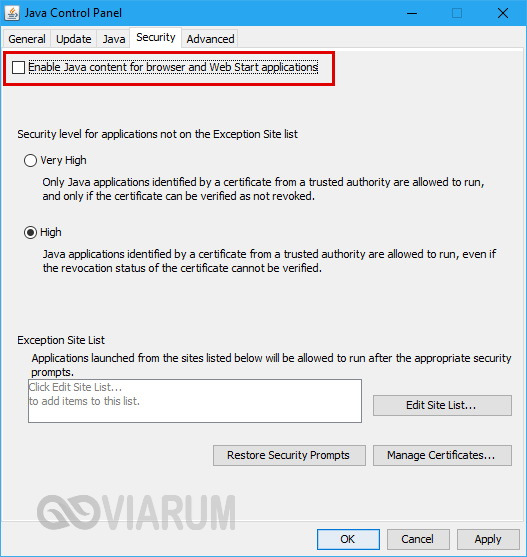
Данный способ не требует радикального удаления старой или поврежденной версии Java, но его можно опробовать в случае появления ошибки 1603 при обновлении Java поверх ранней версии. Откройте панель управления Java (через поиск), переключитесь на вкладку Security и снимите галочку с чекбокса «Enable Java Content for browser…». Сохранив настройки, скачайте автономный установочный пакет Java и осуществите его инсталляцию. По завершении процедуры активируйте ранее отключенную настройку.
Прочие решения
Если у вас не устанавливается Java, выдавая error code 1603, желательно также проверить следующие моменты. Во-первых, убедитесь, что на диске/разделе у вас имеется достаточно места. Во-вторых, проверьте командой sfc /scannow целостность системных файлов (если ошибка возникает при установке и других приложений). В-третьих, выполните откат к предыдущей версии Windows – этот метод является универсальным и позволяет решать разного рода проблемы, связанные с повреждением файлов и реестра.
10 Fixes For Java Error 1603: Update/Install Did Not Complete
Java is a computer language with few implementation stumbling blocks. As a result, it is a popular choice among developers. On the other hand, users must have it installed on their Mac, Windows, or another operating system. Use programs that are built on it.
Installing Java updates in Windows 10. The report “Java install did not complete Error Code: 1603” displays. It is one of the most widespread errors. Malware authors frequently make use of Java weaknesses and vulnerabilities. It is critical to install updates to keep the system secure from potential assaults.
The causes of “Java install did not complete Error Code: 1603” could be various. Antivirus software, web browsers, and other Java-based apps prevent updates from being installed. It prohibits it from being updated, among other things.
This message informs you that you are unable to install the required updates. Suppose a Windows user attempts to update Java when an older version is already installed. They may obtain this error number. The correct Java version should be used according to the user’s Windows operating system.
What is Java error 1603?
The error “Fatal error during installation” is a Windows Installer (MSI) issue. This error usually signifies that “something the installation expected wasn’t available.” Also, “something the installer didn’t expect exists.”
The number 1603 is thrown for a variety of reasons. I will give and then show you how to solve the problem in Java.
Possible Reasons for a Java Error 1603
When the installation starts, Java is already installed.
When you install the JRE-7uxx-windowsxx.exe and the target computer runs Java in a browser, this happens frequently.
The traces of a prior Java installation can be found.
By default, when Java is installed, it tries to delete earlier updates from the same family. Java 7 Update 71, for example, will uninstall Java 7 Update 67 but not Java 6 or Java 8.
The Java Update failed to finish. Previous upgrades aren’t always totally removed. When the updated version tries to install, it may encounter a 1603 error. A stray registry key is sometimes the only trace.
You’re attempting to run an online Java executable.
If you’re going to deploy the EXE, make sure you only install the offline version. If your install file’s name contains the letters “iftw,” you can be sure. Iftw is an acronym for “Install From The Web.” It is a pretty small file.
First and foremost, the Ask Toolbar is typically included in the online version. It’s far worse than any 1603 error you’ll ever come across. Simply use the Java packages from the PDQ Deploy Package Library to get the offline file. Also, use the Java packages from the PDQ Deploy Package Library.
There is a missing installation file.
If you’re installing Java 7 using the extracted MSI, you’ll need files like data1.cab. (Java 8 does not require a separate.cab file.) When deploying Java, an antivirus solution may remove the bundled files, resulting in a 1603 error from the installer.
Methods to fix Java Update Error: 1603

Solve “Java update did not complete Error Code: 1603” by following any of the methods given below.
- Make sure that you are installing the correct version of Java
- Install The Java as administrator
- Turn off Antivirus
- Close programs that run Java
- Task Manager Fix
- Disable Java content
- Uninstall the previous version of Java
- Run Program Install and Uninstall Troubleshooter
- Delete KB2918614 Windows Update
- Don’t install Java with LogMeIn
1. Make sure that you are installing the correct version of Java
Make sure you’re using the correct Java version for your operating system. If you have a 64-bit computer, you need to download 64-bit Java rather than 32-bit Java. Follow these procedures if you’re not sure what version of Windows you’re running.
- Press the Cortana taskbar button in Windows 10.
- In the search area, type in the keyword system.
- Then, to open the window just below, click About your PC.

- Scroll to the System type specification, which indicates whether the platform is 64-bit or 32-bit.
- Make sure you’re not installing 64-bit Java on a 32-bit system first. If you are, this is most likely why Java will not install.
You can choose to download the 32-bit version of Windows x86 Offline. By performing the following tests, you can decide if your system is 32-bit or 64-bit. Another item to consider is if your Java SDK is 32-bit or 64-bit.
If you try to upgrade Java with a 32-bit version to replace a 64-bit Java SDK or the other way around, you may encounter a 64-bit and 32-bit conflict. Install 64-bit Java to replace an old 64-bit version, or update 32-bit Java to the most recent 32-bit version.
2. Install and Run Java as administrator
Installation difficulties can be resolved by installing software as an administrator. As a result, you need to install the most recent Java version as an administrator.
- Install Java by right-clicking it.
- Select the option to run as administrator.

- Begin the setup process and follow the on-screen prompts.
You should no longer get the Java error 1603. However, if the issue persists, attempt the third option.
3. Turn off Antivirus
Another approach is to test your antivirus software. I said that McAfee VirusScan Enterprise has a feature called “Access Protection.” The option to block the installation of browser assistance objects and shell extensions is part of Access Protection. It falls under the heading of “Common Standard Protection.”
The sign explains that enabling this option will prevent Java installation. Because security software frequently blocks Java, your antivirus could be the source of Java error 1603. As a result, to add Java, you should temporarily disable security software:
- Open Task management by right-clicking the taskbar.
- Select your security software from the Startup tab.
- To turn off antivirus, click the Disable option.

- Restart your computer and try again to reinstall Java.
Alternatively, reboot after temporarily removing the antivirus software from the Windows starting. The Task Manager’s Startup tab shows how you may disable antivirus software.
- To prevent the software from starting, press the Disable button.
- After restarting Windows, install Java.
4. Close programs that run Java
Before installing Java, make sure all other programs are closed. When you try to install the latest version, there may be programs that execute Java.
You must close the browser and any other Java-enabled apps after using the Java installation. If you don’t, you can get a Java error 1603.
After downloading the Java installer, close your browser. All other program windows on the taskbar should be closed.
Also, see if there are any third-party program icons in your system tray (notification area). If this is the case, close the programs in the system tray.
5. Task Manager Fix
I have also found that the java error code 1603 error message can also be solved using task manager.
- The Offline Installer is available for download.
- Activate Task Manager.
- All non-system processes, as well as the whole Explorer process tree, should be terminated.
- Start the Task Manager again by pressing Ctrl-Alt-Del.
- Start the Offline Installer by running a file.
- Check To See If JAVA Is Now Installed And Functioning Properly.

6. Disable/Enable Java content
Before installing, this approach blocks Java content in the browser.

- Shut Down The Installer When You Get The 1603 Error.
- In the Java Control Panel, locate and
- “Enable Java Content” in the Web Browser should be unchecked.
- Select the Security tab (uncheck) in the Java Control Panel.
- Uncheck the option Enable Java Content In The Browser.
- To Verify The Modifications, Select Apply And Then OK.
- Java must be reinstalled, and Java content must be enabled again in the browser.
- The Offline Installer Package can be downloaded and installed.
- If you need to use Java content in the browser, after the installation is complete, re-enable “Enable Java content” in the browser.
7. Uninstall the previous version of Java
Error Code 1603 may be resolved by uninstalling an older version of Java. You can download the Java uninstall programs from the official website. Then start the installer and copy the on-screen instructions.
You can also manually use the Control Panel, which requires you to uninstall it as a regular program and then reinstall it.
8. Run Program Install and Uninstall Troubleshooter
A program installation troubleshooter is not included with Windows. The Program Install and Uninstall troubleshooter is still available for download.
That troubleshooter may be able to help you fix Java problem 1603. By clicking the Download option, you may install the troubleshooter on Windows 10. Then, to launch the window, go to the location where you saved the installer. Double-click MicrosoftProgram Install and Uninstall.meta.diagcab.
- From Microsoft’s official website, download and install the “Program Install and Uninstall troubleshooter.”
- To open the Troubleshooter, double-click the MicrosoftProgram Install and Uninstall.meta.diagcab file.
- In the new window, click Next and follow the on-screen instructions.
9. Delete KB2918614 Windows Update
For many Windows 10 users, Windows Update KB2918614 appears to generate Java installation and update difficulties. As a result, deleting this update may assist in resolving the issue.
- Using the Windows key + R, open the Run dialogue box. In the Run box that opens up, type appwiz.cpl and click OK.
- When the Programs in Features box displays, click the View installed updates option in the left panel.
- You’ll see a list of updates that have been installed. Look for the code KB2918614.
- Click the Uninstall button next to the KB2918614 Windows update.
- Once the uninstallation is finished, restart your personal computer to see if the Java issue 1603 has been resolved.
Windows may reinstall the KB2918614 update. Disable automatic updates to stop this from happening.
10. Don’t install Java with LogMeIn
When LogMeIn users attempted to install Java remotely. They received the Java error message 1603. The LogMeIn remote desktop software can cause an installation error.
So, if you’re using LogMeIn to install Java. Uninstall it and install Java on your PC without using remote desktop software. Check out other LogMeIn alternatives if you require remote desktop software to install Java.
Conclusion
There are a few options for resolving Java problem 1603. I hope that these suggestions from my list helped resolve Java problem 1603.